
PivotPanel
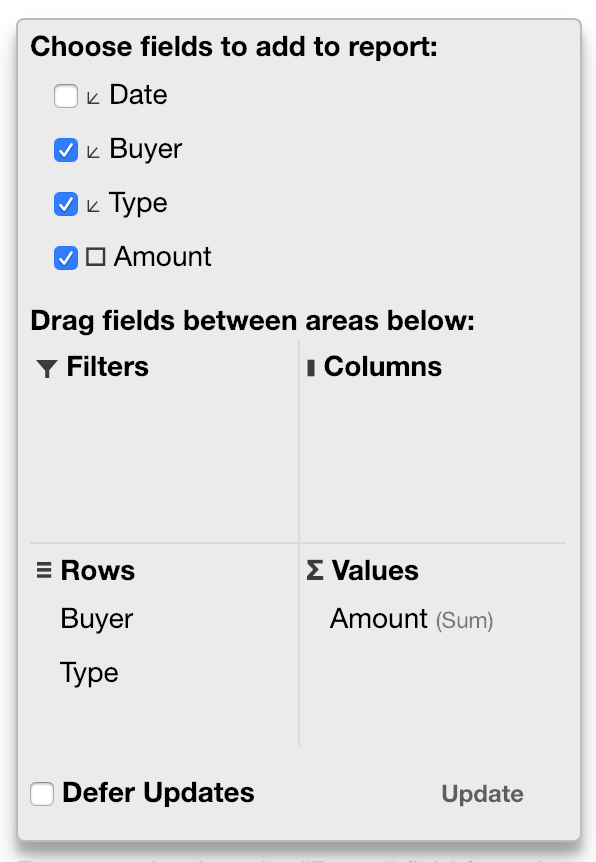
The PivotPanel control provides a drag-drop UI for editing a PivotEngine's fields and field lists.
You can drag fields among field lists to build views, and use each fields context menu to customize the field properties, including format, aggregate, etc.
Create a PivotPanel control
Set the PivotPanel.itemsSource property to an instance of a PivotEngine in order to connect the two components.
First, create a host element for the panel
<div id="panel"></div>
Then instantiate the PivotPanel control and bind the PivotEngine to it.
let engine = new wjOlap.PivotEngine();
engine.itemsSource = rawData;

let panel = new wjOlap.PivotPanel('#panel');
panel.itemsSource = engine;
Fields
The PivotEngine has several field collections exposed as properties:
- fields: Contains all the fields available in the data source.
- valueFields: Contains fields used as "measures", typically numeric values that are summarized by the engine.
- rowFields and columnFields: Contain fields used as "dimensions", typically strings or dates that are used to break up data into groups.
- filterFields: Contain fields that are used only for filtering the data (they are not included in the output summary).
Value Fields (Measures)
The PivotPanel allows you to drag multiple copies of fields into the valueFields collection. When you do that, the panel creates clones that have their own properties.
This allows you to summarize fields using different aggregates and calculations. For example, you can show a column with sums and another with averages, running totals or percentages.
Row and Column Fields
The PivotEngine ensures each dimension field appears only once in the view. If you drag the "Buyer" field into the columnFields area, it will automatically be removed from the rowFields area.
The PivotEngine uses the dimension fields to break up the data into groups. It does this using formatted values, so if you format a date field as year (yyyy) or quarter (q) the data will be summarized by year or quarter.
If you want to be able to summarize the data by year and by quarter, create two copies of the date fields, each with a different format and header.
Filter Fields
The filterFields list allows you to apply filters based on fields that are not being used as measures or dimensions.
For example, you may want to show expenses by Buyer and Type for a certain year only.
To do that, follow these steps:
- Drag the "Date" field into the Filters area.
- Right-click the field and select the "Field Settings..." option.
- In the filter editor dialog, click the "Edit..." button next to "Filter".
- In the filter editor dialog, check the years you are interested in.
- Click "OK" to close the editors.
Edit Fields
You can edit fields from the PivotPanel's context menu. To do so, right-click a field on the panel and select the "Field Settings..." option. This will bring up a dialog where you can edit the field's properties, including the filter (you can also do this from the PivotGrid on the right):
Create Views with PivotPanel
Now that the PivotPanel is bound to a PivotEngine object containing the data, you can manipulate the views without code. Most of your users will interact with the tool in this manner.
Start by selecting a field and adding it to a field list.